
Smart Contracts 04: Deployment
Deploy the InteractionLogger smart contract locally and on Arbitrum Sepolia, verify it on Arbiscan, and interact with it via console and blockchain explorer UI.

Welcome Back!
Previously, in Part 03: Testing you tested the InteractionLogger smart contract. Now it is time to deploy it and send real transactions. First to a local blockchain for fast iteration, and then to Arbitrum Sepolia (a public Ethereum Layer 2 testnet) so anyone can inspect and interact with it.
Table of Contents
- Introduction
- Deployment Script
- Local Deployment (Hardhat Network)
- Public Deployment (Arbitrum Sepolia)
- What’s Next?
1. Introduction
Deploying a smart contract means publishing its bytecode on-chain via a transaction. Once deployed, the contract gets a permanent address and can be called by anyone.
My personal proven workflow is:
- Deploy locally for fast feedback loops
- Deploy to a public testnet for realistic conditions (gas, explorers, wallet apps)
- Verify the source code so others can read and interact with it
2. Deployment Script
🎯 Goal
Create a Hardhat script that deploys InteractionLogger which we will use for both deployments (local and public).
💻 Code
Create the directory scripts:
mkdir -p scriptsCreate the file scripts/deploy.ts and add the following code:
import { ethers } from "hardhat";

async function main() {
  const [deployer] = await ethers.getSigners();
  console.log("Deploying with:", deployer.address);

  const contract = await ethers.deployContract("InteractionLogger", []);
  await contract.waitForDeployment();

  console.log("InteractionLogger deployed to:", contract.target);
}

main().catch((error) => {
  console.error(error);
  process.exitCode = 1;
});
🔍 Breakdown
ethers.getSigners()returns local accounts (the first one is used as the deployer)ethers.deployContract(...)deploys the smart contractwaitForDeployment()waits until the block where the transaction resides, is minedcontract.targetreturns the contract address
3. Local Deployment (Hardhat Network)
In this chapter you will deploy the smart contract to a local blockchain, i.e. the Hardhat Network.
3.1 Start the Local Node
🎯 Goal
Run a local blockchain that behaves like Ethereum, but resets whenever you restart it.
💻 Code
Open a terminal and run:
npx hardhat nodeKeep this terminal running.
🔍 Breakdown
As an in-memory blockchain, Hardhat Network is fast and deterministic and provides funded test accounts automatically. This is perfect for local development without the hassle of acquiring testnet coins.
3.2 Deploy the Smart Contract
🎯 Goal
Deploy InteractionLogger to the local node and copy the contract address.
💻 Code
Open a second terminal and run:
npx hardhat run --network localhost scripts/deploy.tsCopy the printed contract address and save it for later use.
🔍 Breakdown
--network localhosttells Hardhat to send the deployment transaction to your local node- Each restart of the node resets the blockchain state
3.3 Interact via Hardhat Console
🎯 Goal
Call functions on your deployed contract directly using the interactive Hardhat console.
💻 Code
Start the console:
npx hardhat console --network localhostLoad the deployed contract (replace YourCopiedAddressHere with the contract address you saved above):
const contract = await ethers.getContractAt(
  "InteractionLogger",
  "YourCopiedAddressHere"
);
Write data:
await contract.setInteraction("Alice");Read data:
await contract.getInteractionByName("Alice");Example output:
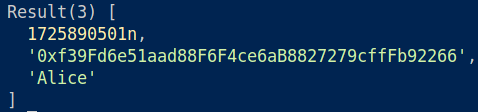
🔍 Breakdown
getContractAt(name, address)creates a contract instance pointing to an existing deploymentsetInteraction(...)creates a transaction and sends it to the deployed contractgetInteractionByName(...)reads the current state
4. Public Deployment (Arbitrum Sepolia)
In this chapter, you will deploy the smart contract to a public blockchain.
Public networks usually come in two flavors: mainnets and testnets. On a mainnet, every transaction costs real money, so you need real funds in your wallet. Since we are experimenting and learning, we will deploy to a testnet instead, specifically Arbitrum Sepolia, an Ethereum Layer-2 test network.
4.1 Prepare Environment Variables for Secrets
🎯 Goal
Avoid hardcoding sensitive information (mnemonic, API key) and keep it out of your source code.
💻 Code
Install dotenv:
npm install dotenvCreate a .env file in the project root and add the following lines:
MNEMONIC=""
ARBISCAN_API_KEY=""
🔍 Breakdown
dotenvlets you read values from a.envfile- Hardhat has already added an entry for
.envin.gitignore - Git ignores everything listed in
.gitignore, so secrets will not be committed
4.2 Set Your Mnemonic
🎯 Goal
Provide a signing account for deployment transactions.
💻 Code
Set the mnemonic you have created in Part 01: Setup in .env:
MNEMONIC="word1 word2 ... word12"🔍 Breakdown
- Hardhat derives accounts from the mnemonic and uses them to sign transactions.
4.3 Set Your Arbiscan API Key
🎯 Goal
Create an Arbiscan API key so Hardhat can verify your contract automatically after deployment.
💻 Code
- Go to Arbiscan, create an account, and sign in:
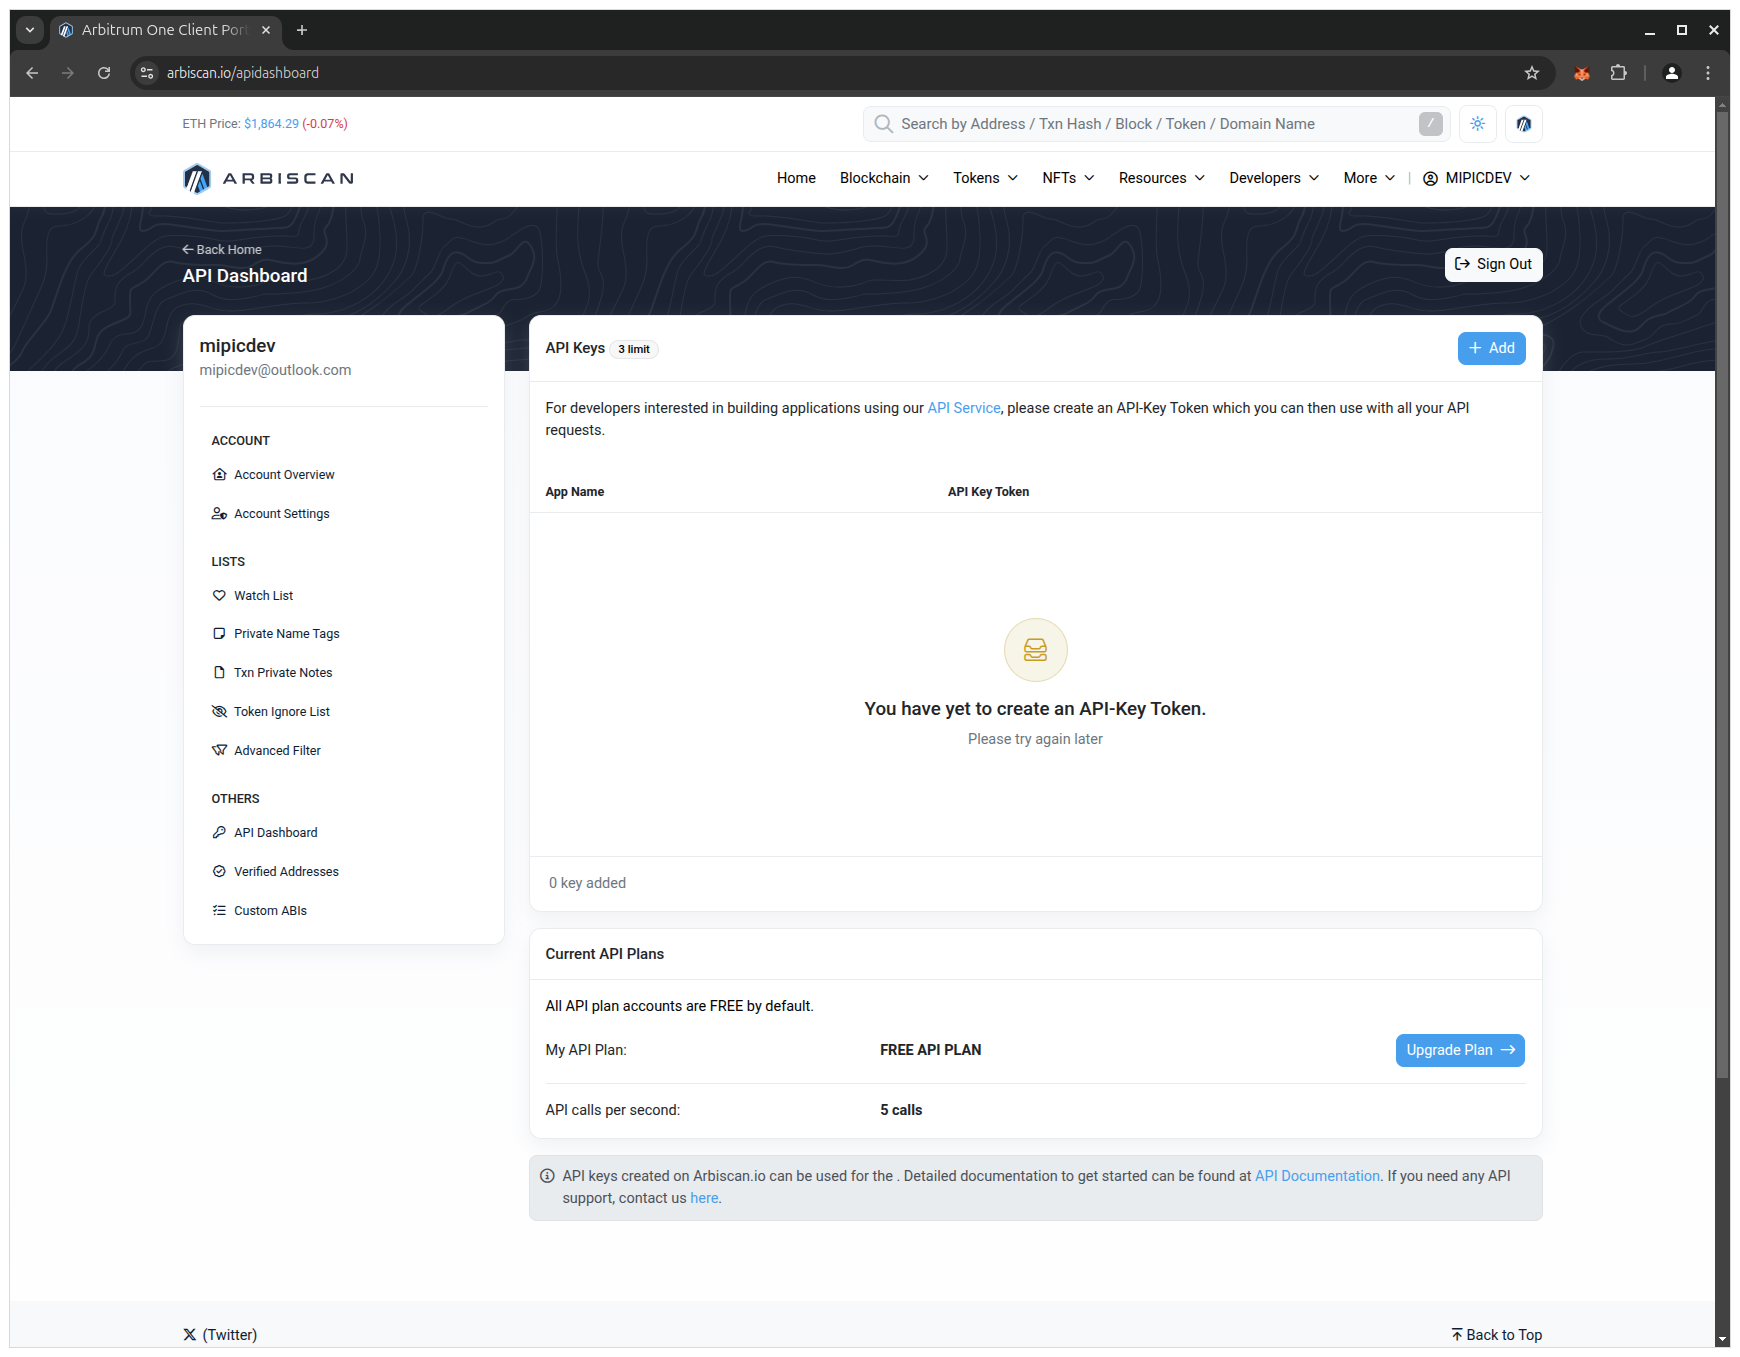
https://arbiscan.io/- Open the API Keys page and click + Add:
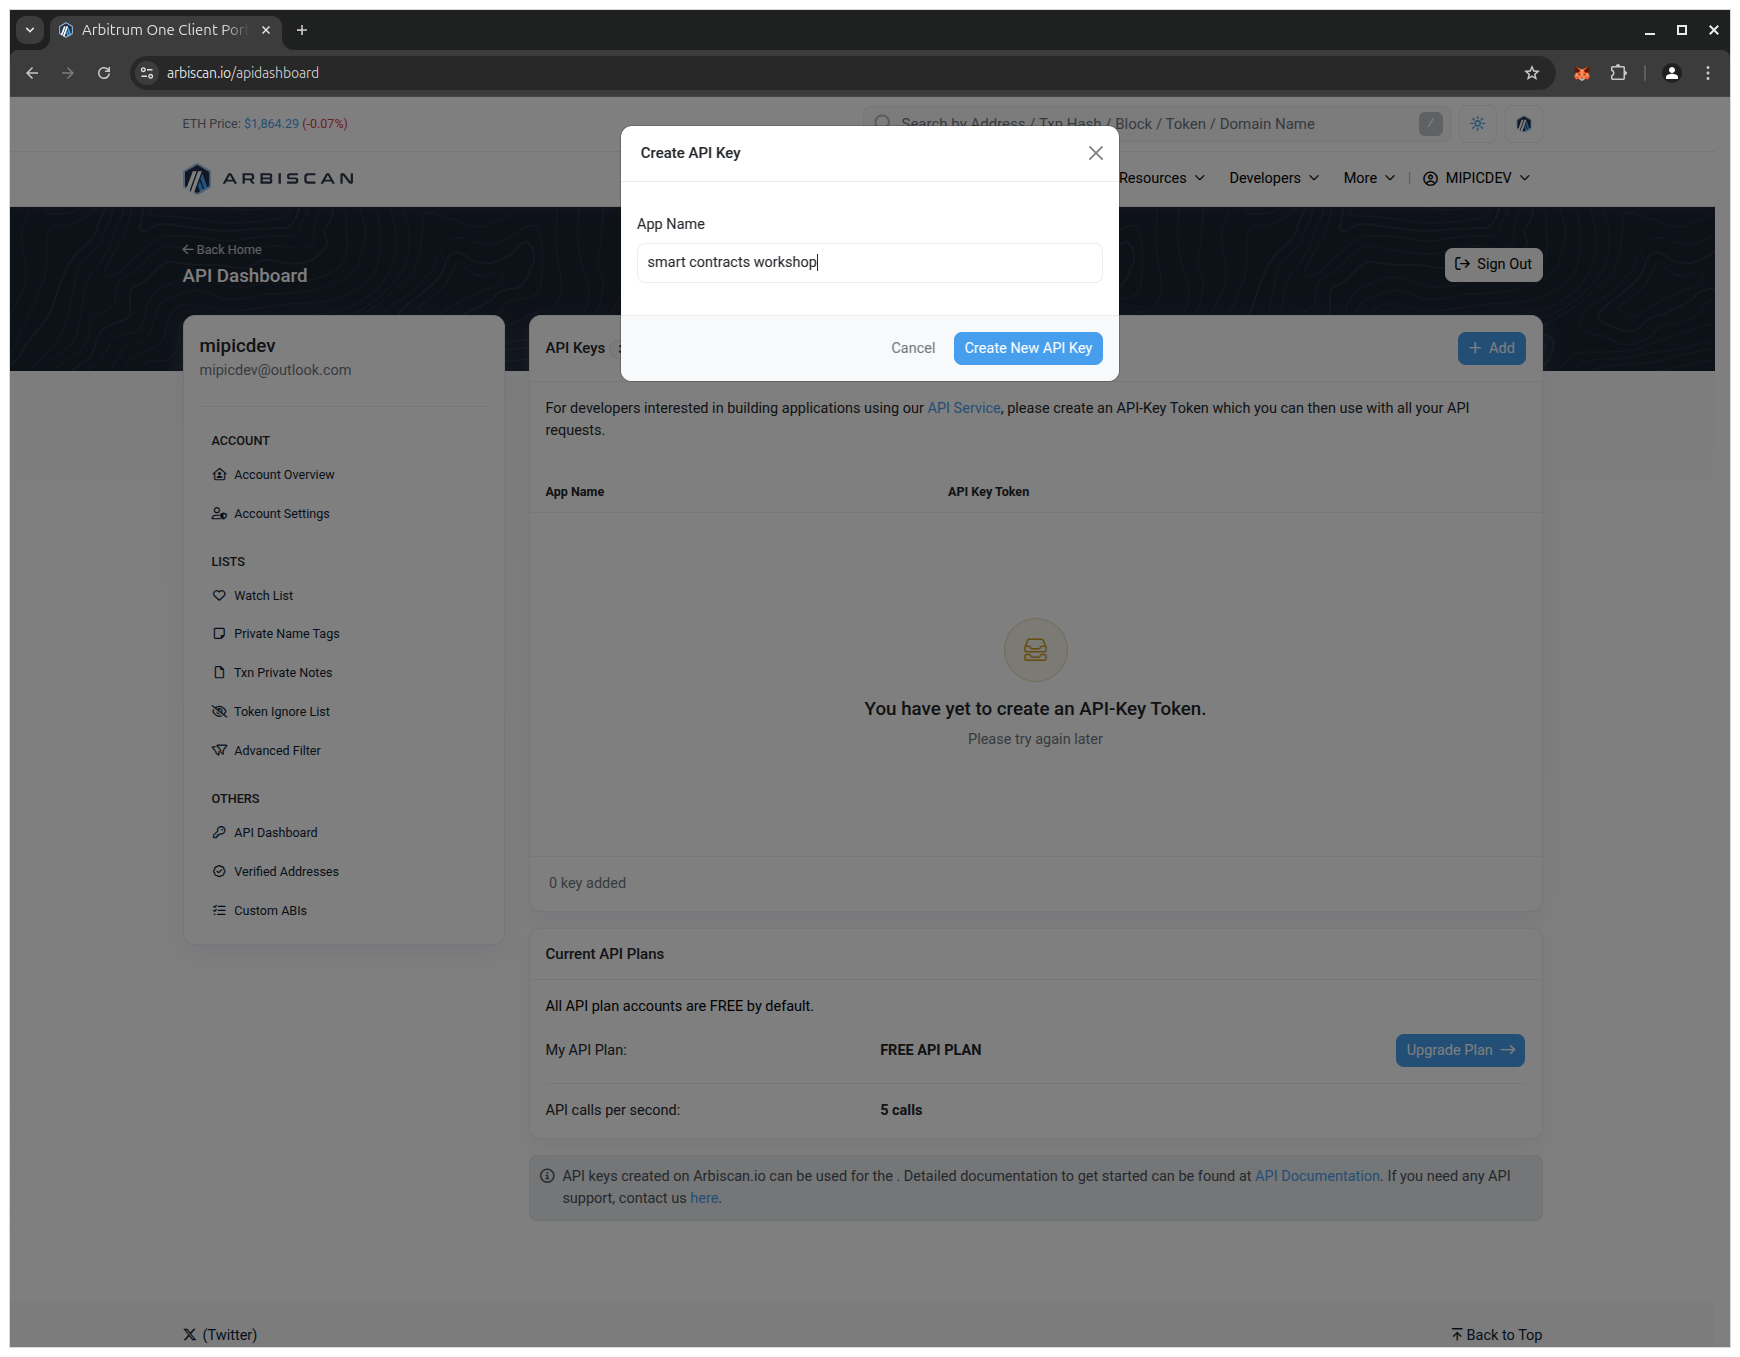
- Enter a name for the key and click Create New API Key:
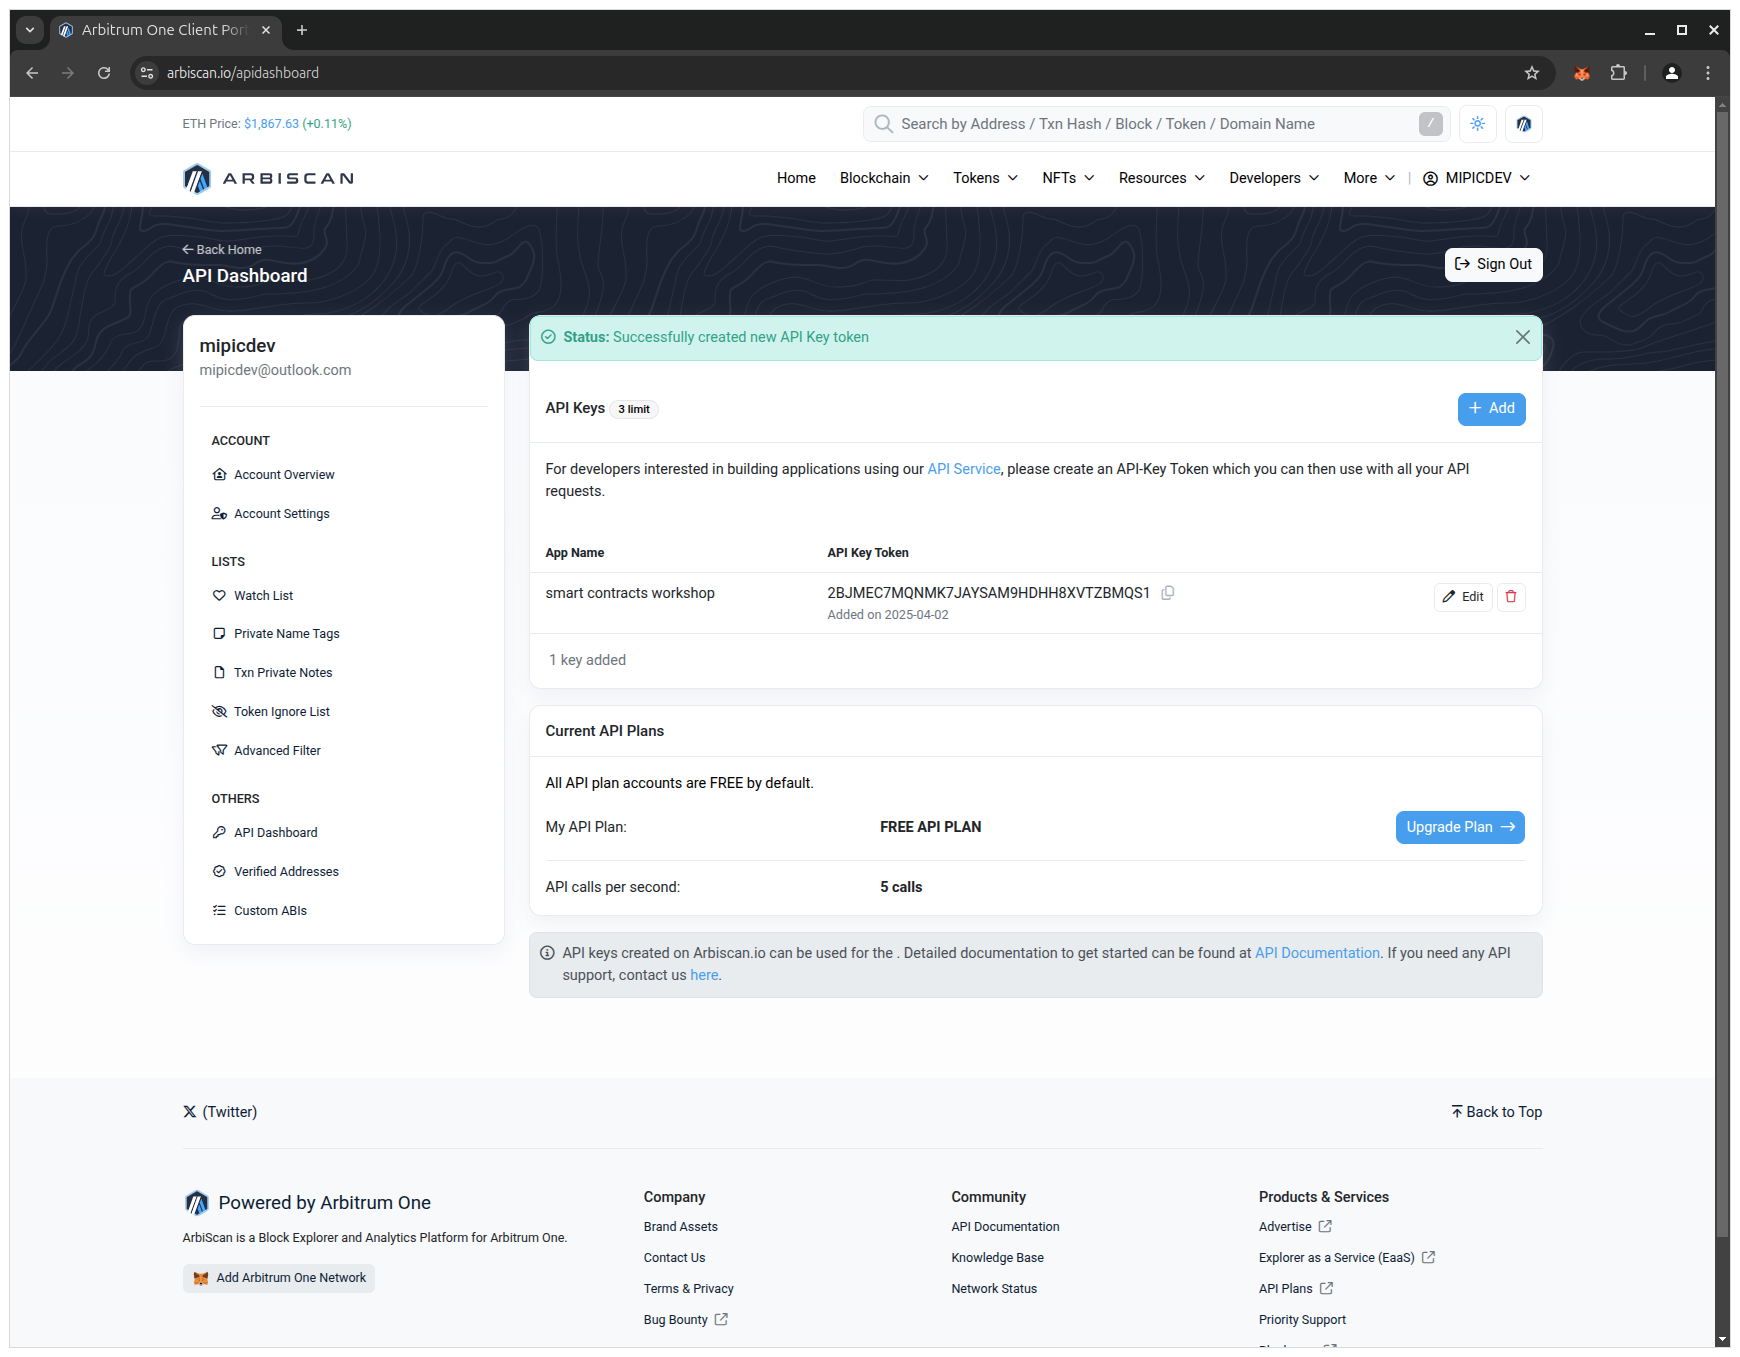
- Copy the key and paste it into your
.envfile:
ARBISCAN_API_KEY="YOUR_ARBISCAN_API_KEY"🔍 Breakdown
Hardhat uses your API key to submit contract metadata for verification, so Arbiscan can display your source code and enable the Read Contract and Write Contract tabs.
4.4 Configure Hardhat for Arbitrum Sepolia
🎯 Goal
Add Arbitrum Sepolia as a Hardhat network and configure verification via Arbiscan.
💻 Code
Update hardhat.config.ts:
import { HardhatUserConfig } from "hardhat/config";
import "@nomicfoundation/hardhat-toolbox";
import "dotenv/config";

const MNEMONIC = process.env.MNEMONIC || "";
const ARBISCAN_API_KEY = process.env.ARBISCAN_API_KEY || "";

if (!MNEMONIC) {
  throw new Error("Missing MNEMONIC in .env");
}

if (!ARBISCAN_API_KEY) {
  throw new Error("Missing ARBISCAN_API_KEY in .env");
}

const config: HardhatUserConfig = {
  solidity: "0.8.24",
  networks: {
    arbitrumSepolia: {
      url: "https://sepolia-rollup.arbitrum.io/rpc",
      chainId: 421614,
      accounts: {
        mnemonic: MNEMONIC,
        path: "m/44'/60'/0'/0",
        initialIndex: 0,
        count: 1,
      },
    },
  },
  etherscan: {
    apiKey: ARBISCAN_API_KEY,
  },
};

export default config;
🔍 Breakdown
- The network name
arbitrumSepoliais what you will use in CLI commands chainId: 421614targets the correct Arbitrum Sepolia chainetherscan.apiKeyis used by Hardhat’s verification task@nomicfoundation/hardhat-toolboxincludes verification support
4.5 Deploy the Smart Contract
🎯 Goal
Deploy InteractionLogger to the testnet and obtain the deployed address.
💻 Code
Run:
npx hardhat run --network arbitrumSepolia scripts/deploy.tsCopy the printed contract address and save it for later use.
🔍 Breakdown
This sends a real deployment transaction to Arbitrum Sepolia.
4.6 Check the Deployment
🎯 Goal
Locate your contract in the official Arbitrum Sepolia blockchain explorer to confirm it exists on-chain.
💻 Code
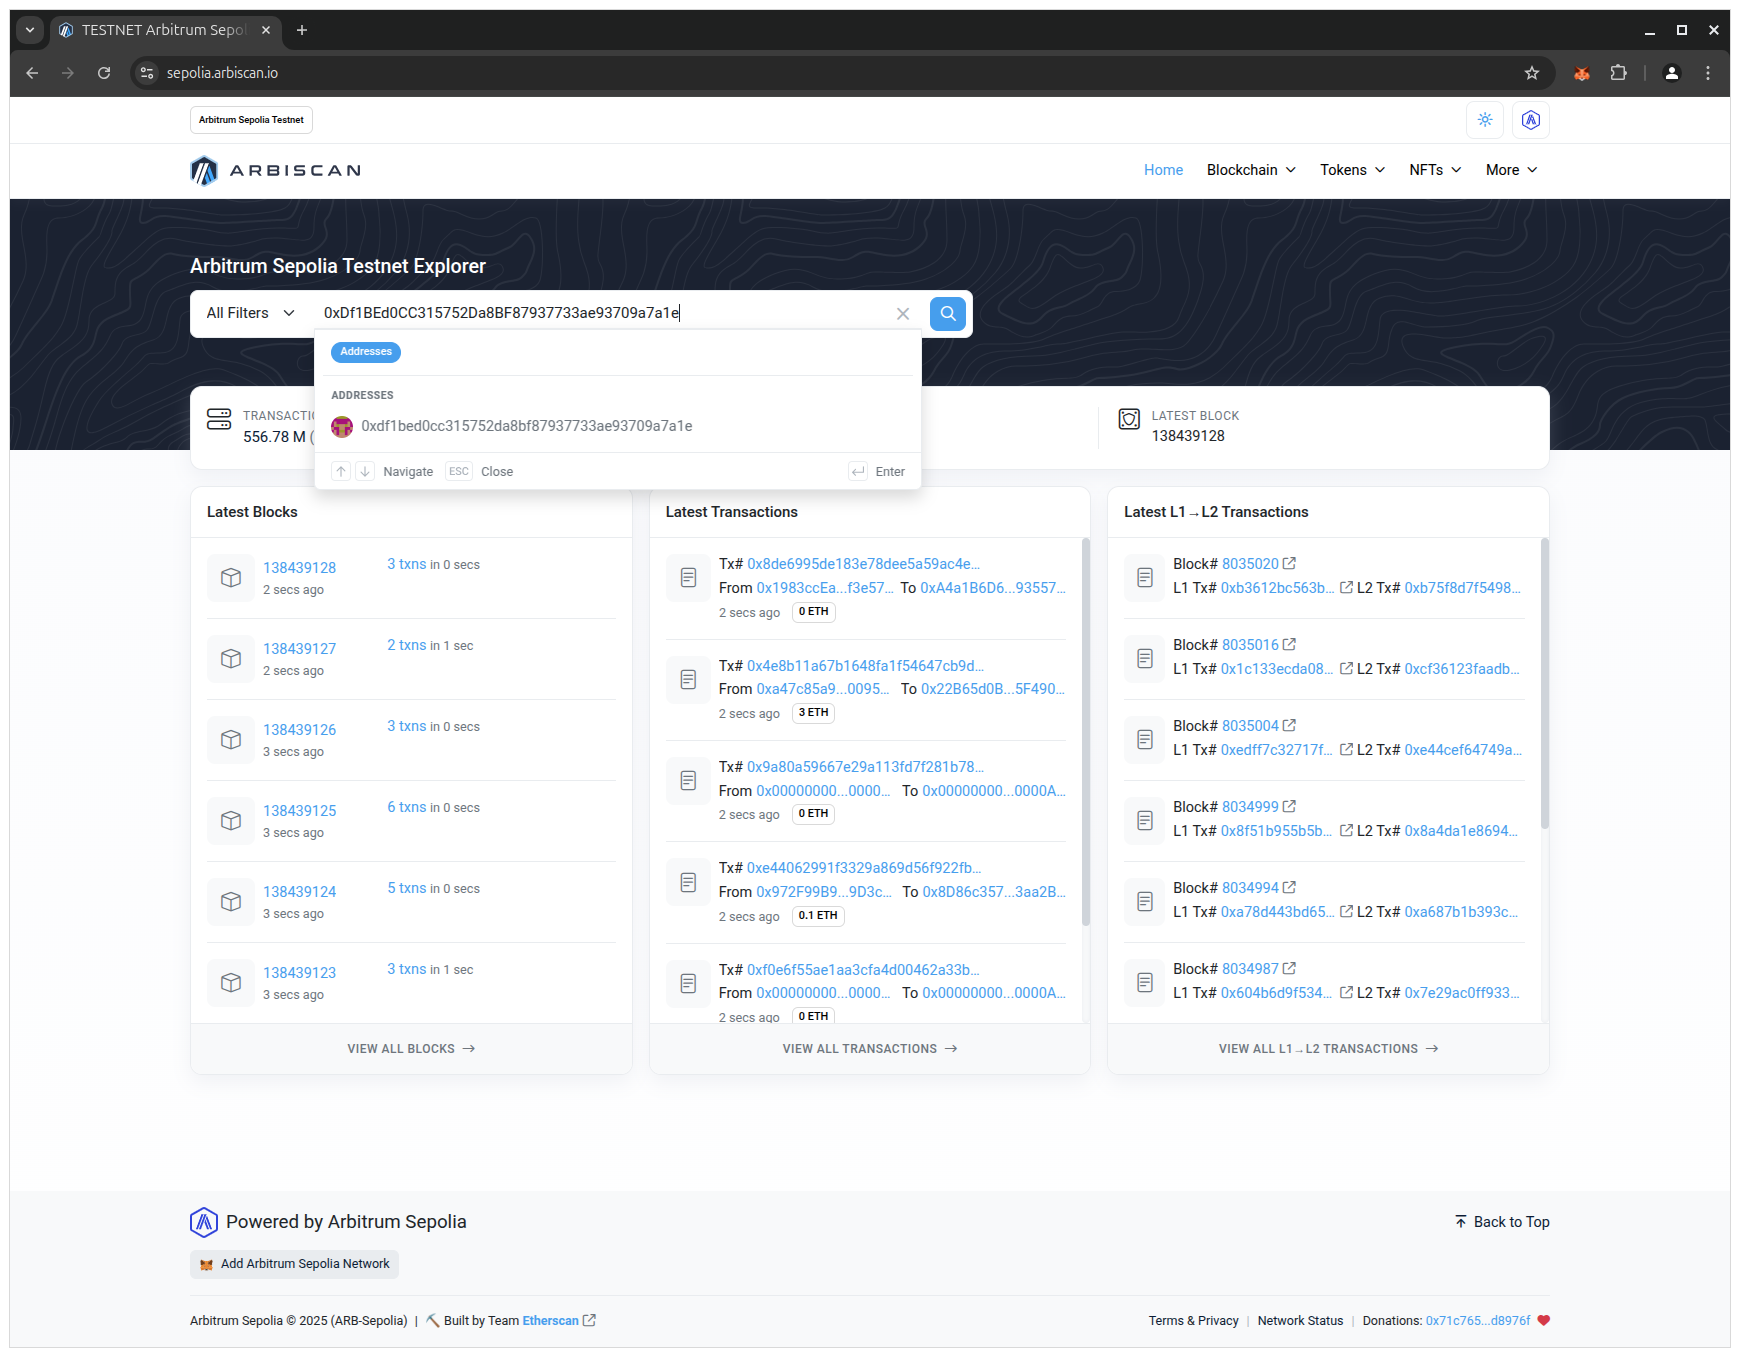
- Open Arbiscan:
https://sepolia.arbiscan.io/- Paste your saved contract address from above into the search bar and open the result:
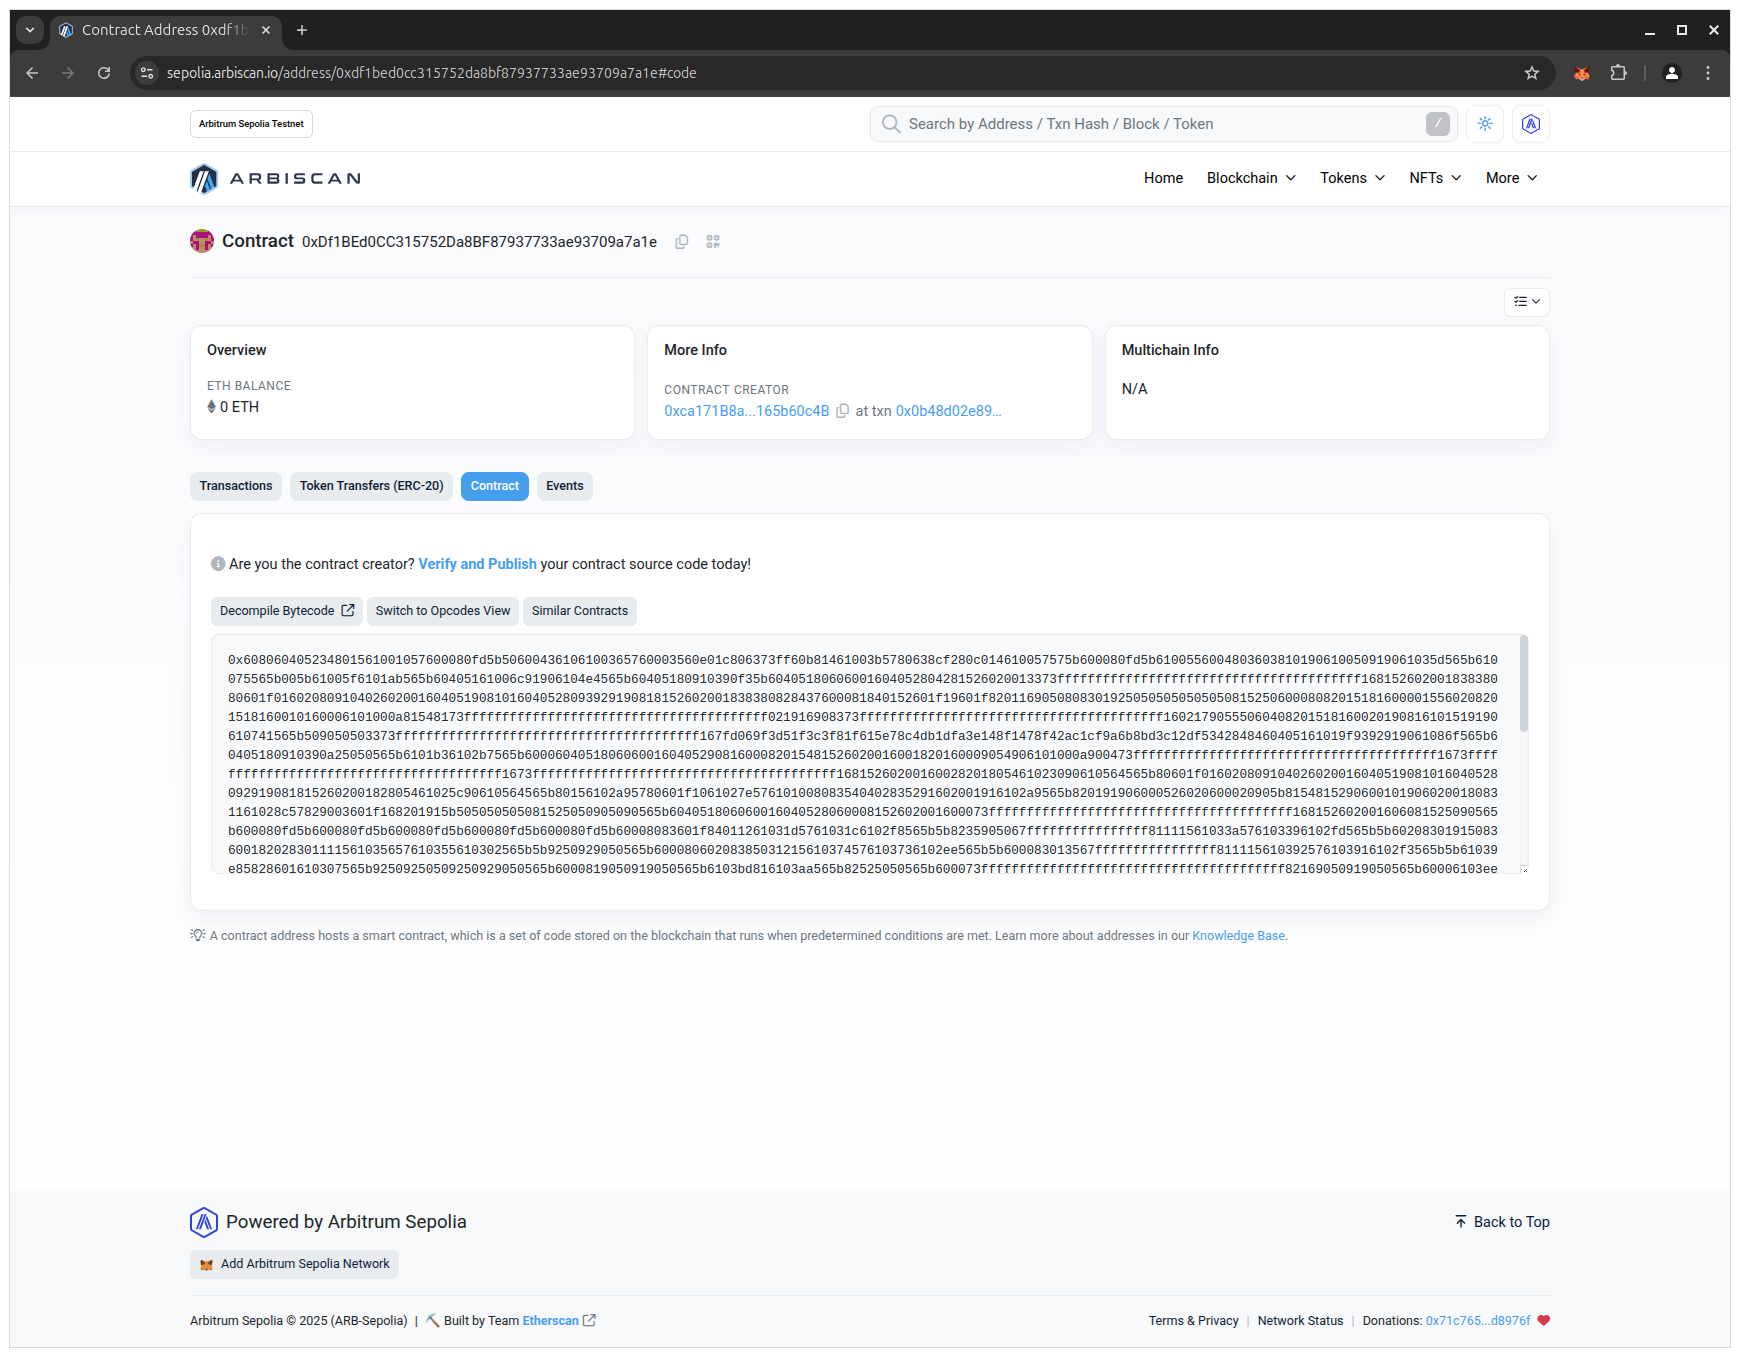
- Open the Contract tab to see the details of the smart contract:
🔍 Breakdown
Before verification, blockchain explorers typically show bytecode and transactions, but not your readable source code.
4.7 Verify the Contract on Arbiscan
🎯 Goal
Publish the source code so others can read and interact with the contract.
💻 Code
Verify:
npx hardhat verify --network arbitrumSepolia YourContractAddressHereExample output:

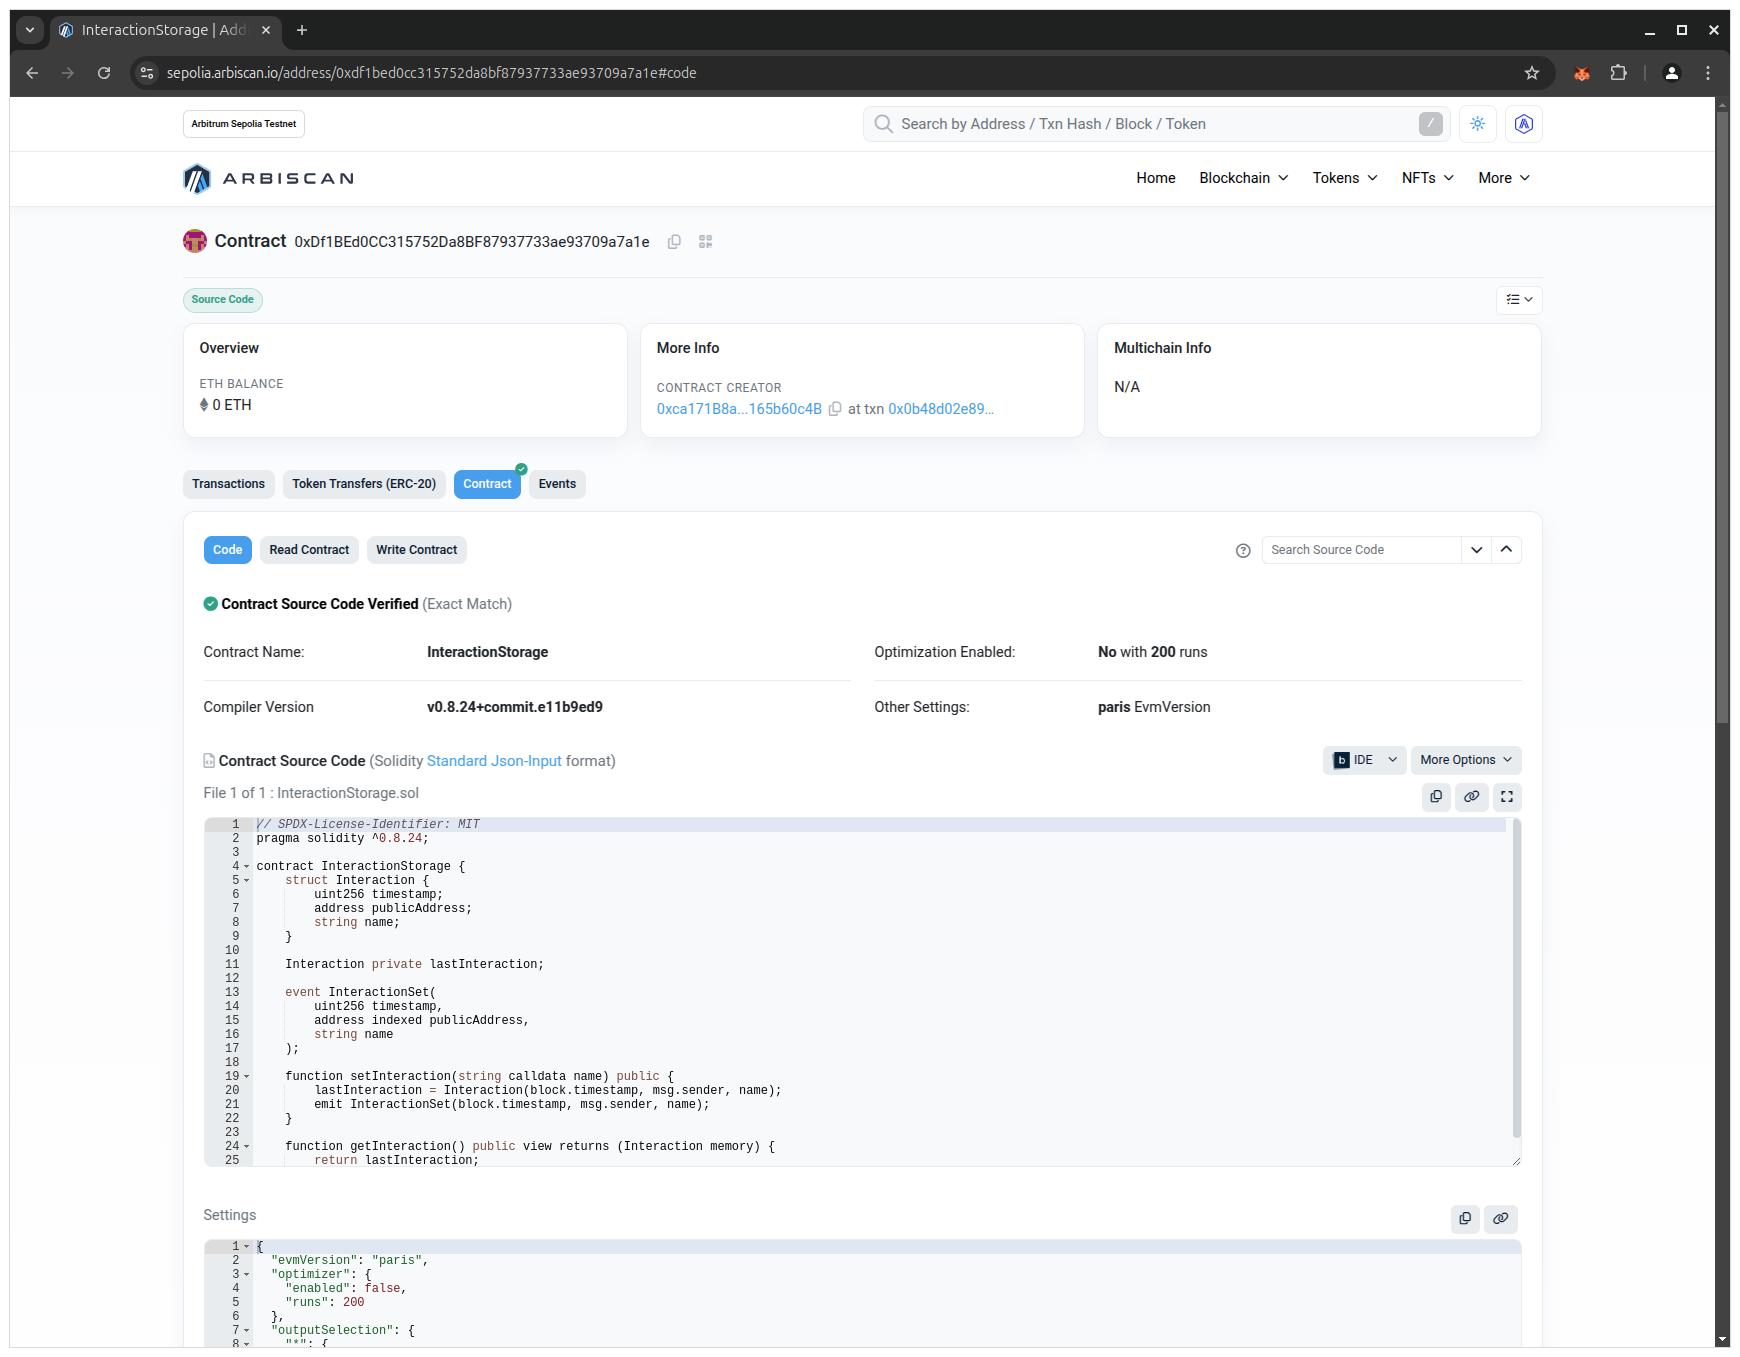
Refresh the Arbiscan page. You should now see the three tabs Code, Read Contract, and Write Contract:
🔍 Breakdown
Verification links on-chain bytecode to your source code. For verification to succeed:
- compiler version must match
- settings must match
- constructor args must match
4.8 Write to the Contract via Arbiscan
🎯 Goal
Call setInteraction(...) via the explorer UI using MetaMask.
💻 Code
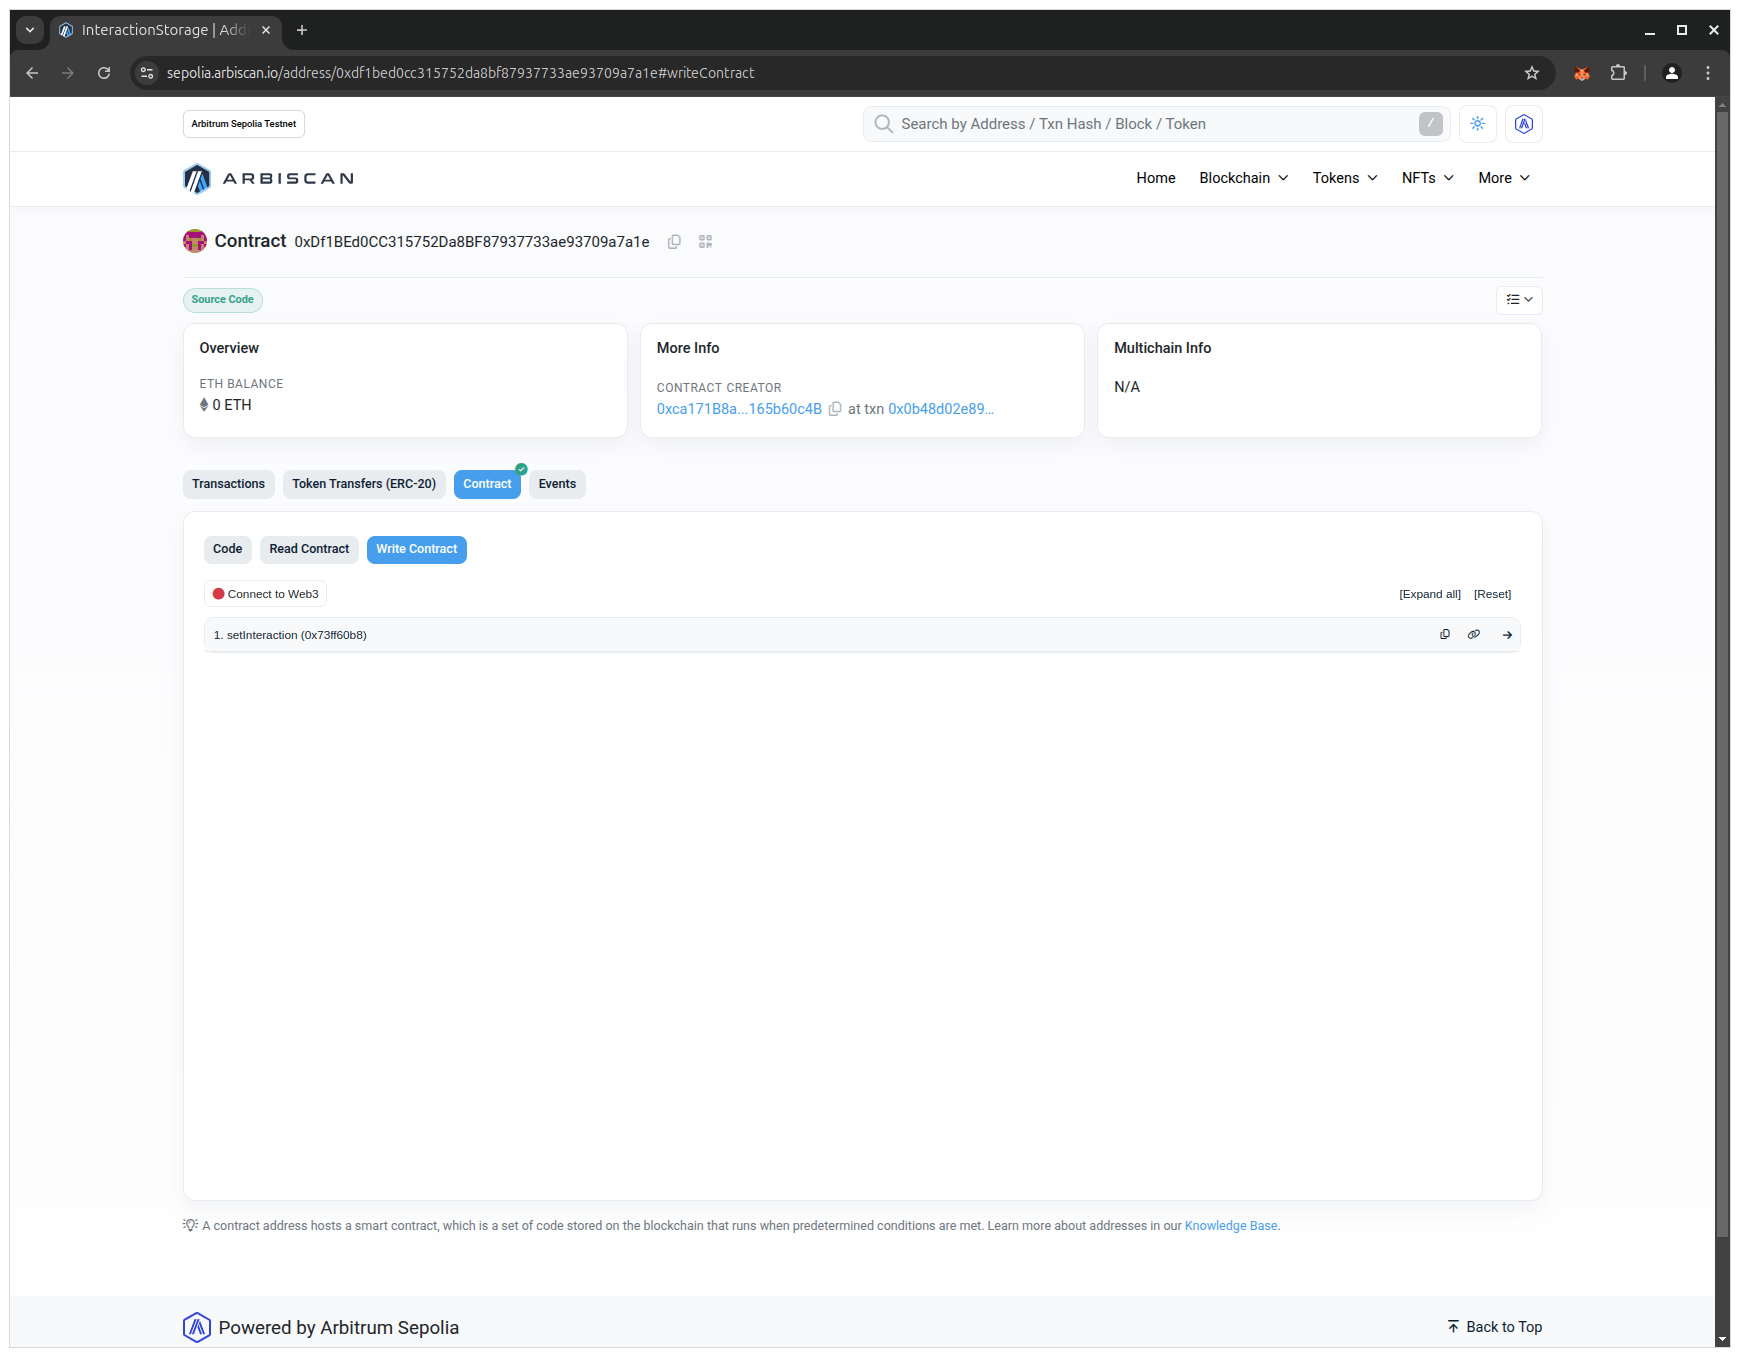
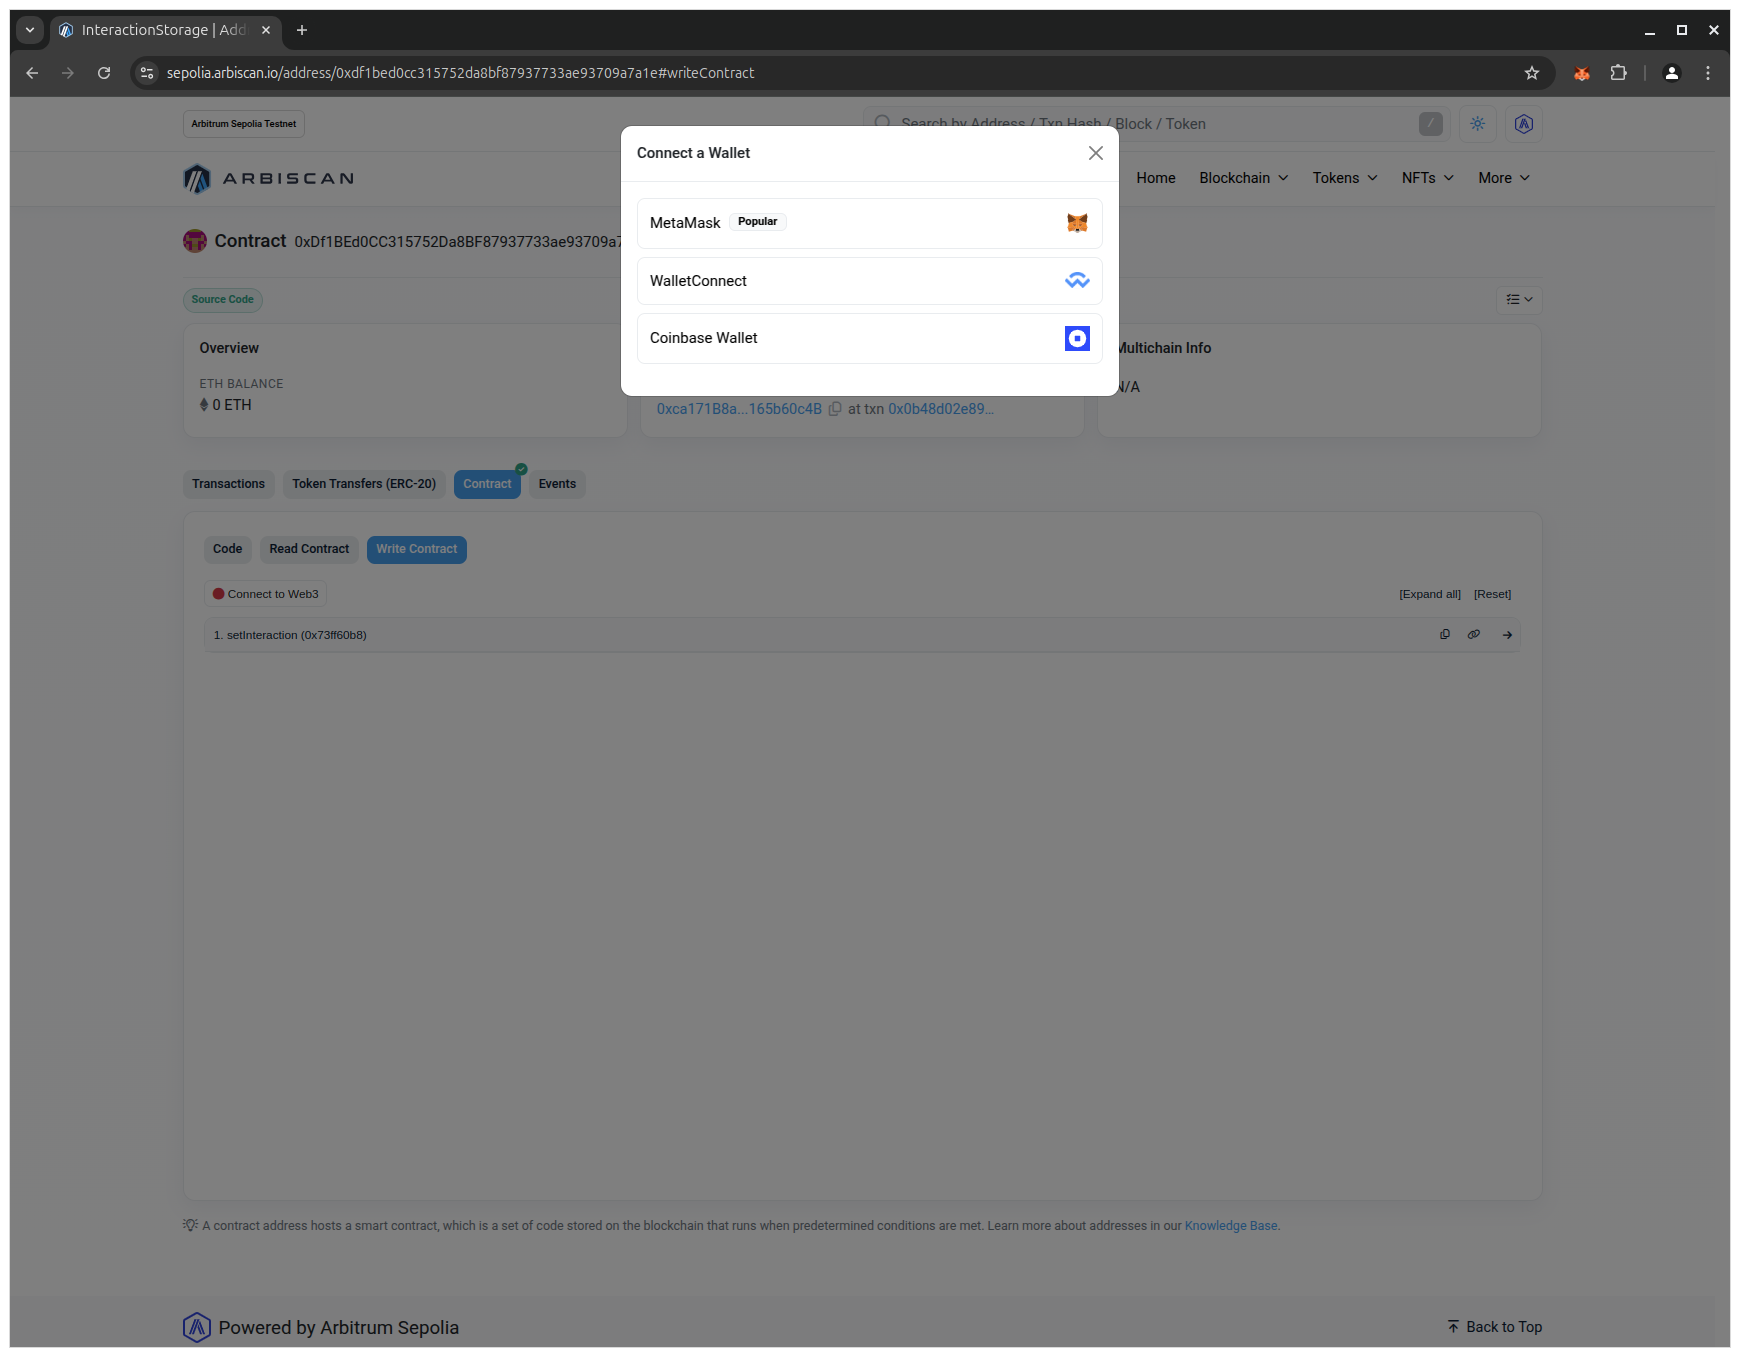
- Open on the Write Contract tab and click on the Connect to Web3 button:
- Select MetaMask:
- Click on the Connect button:
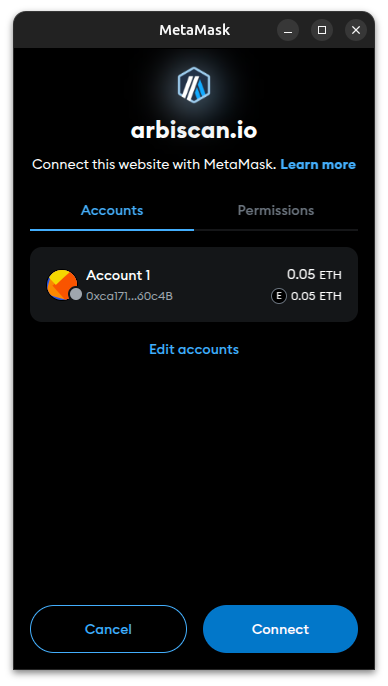
- You are now connected with your MetaMask wallet and may interact with the smart contract:
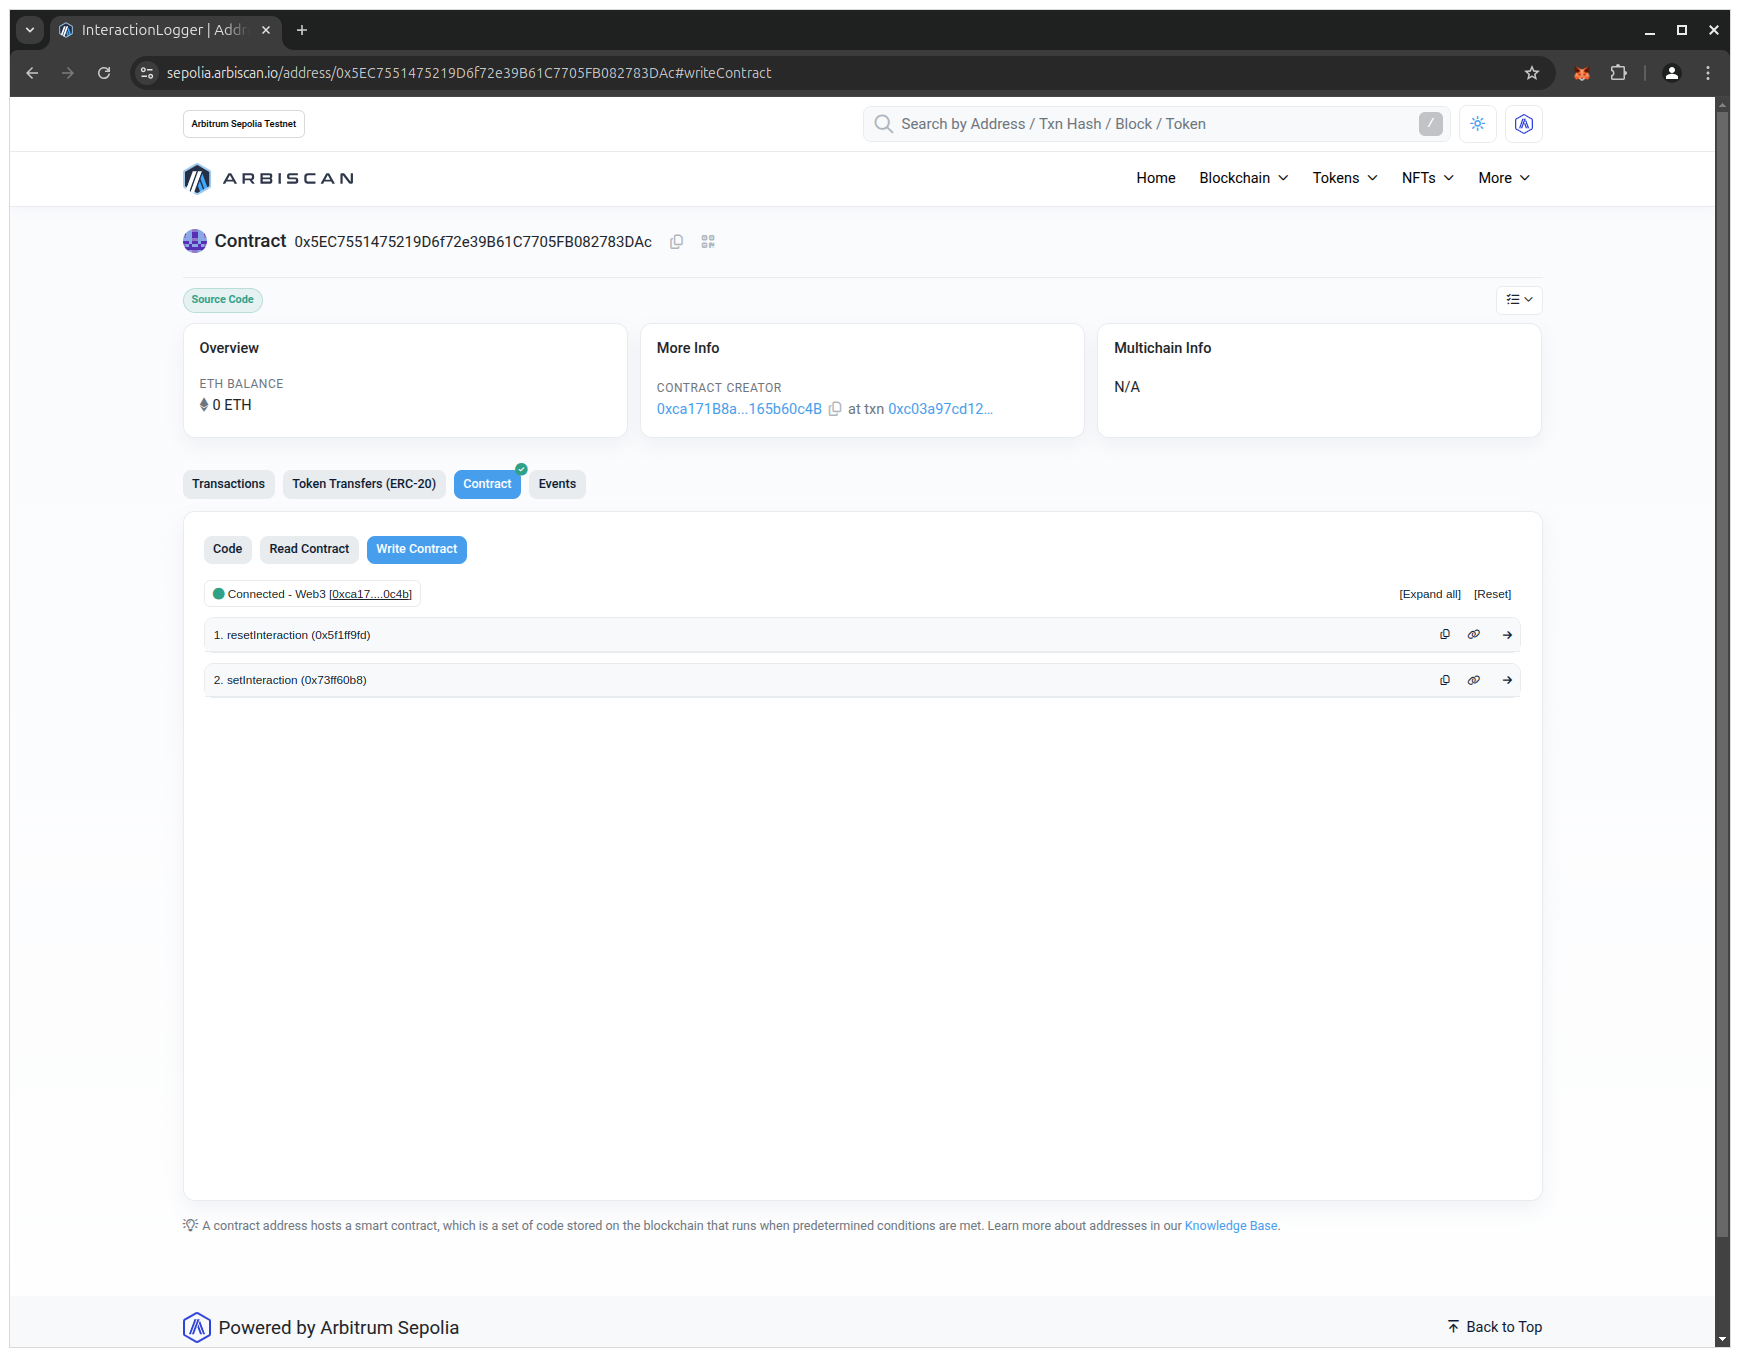
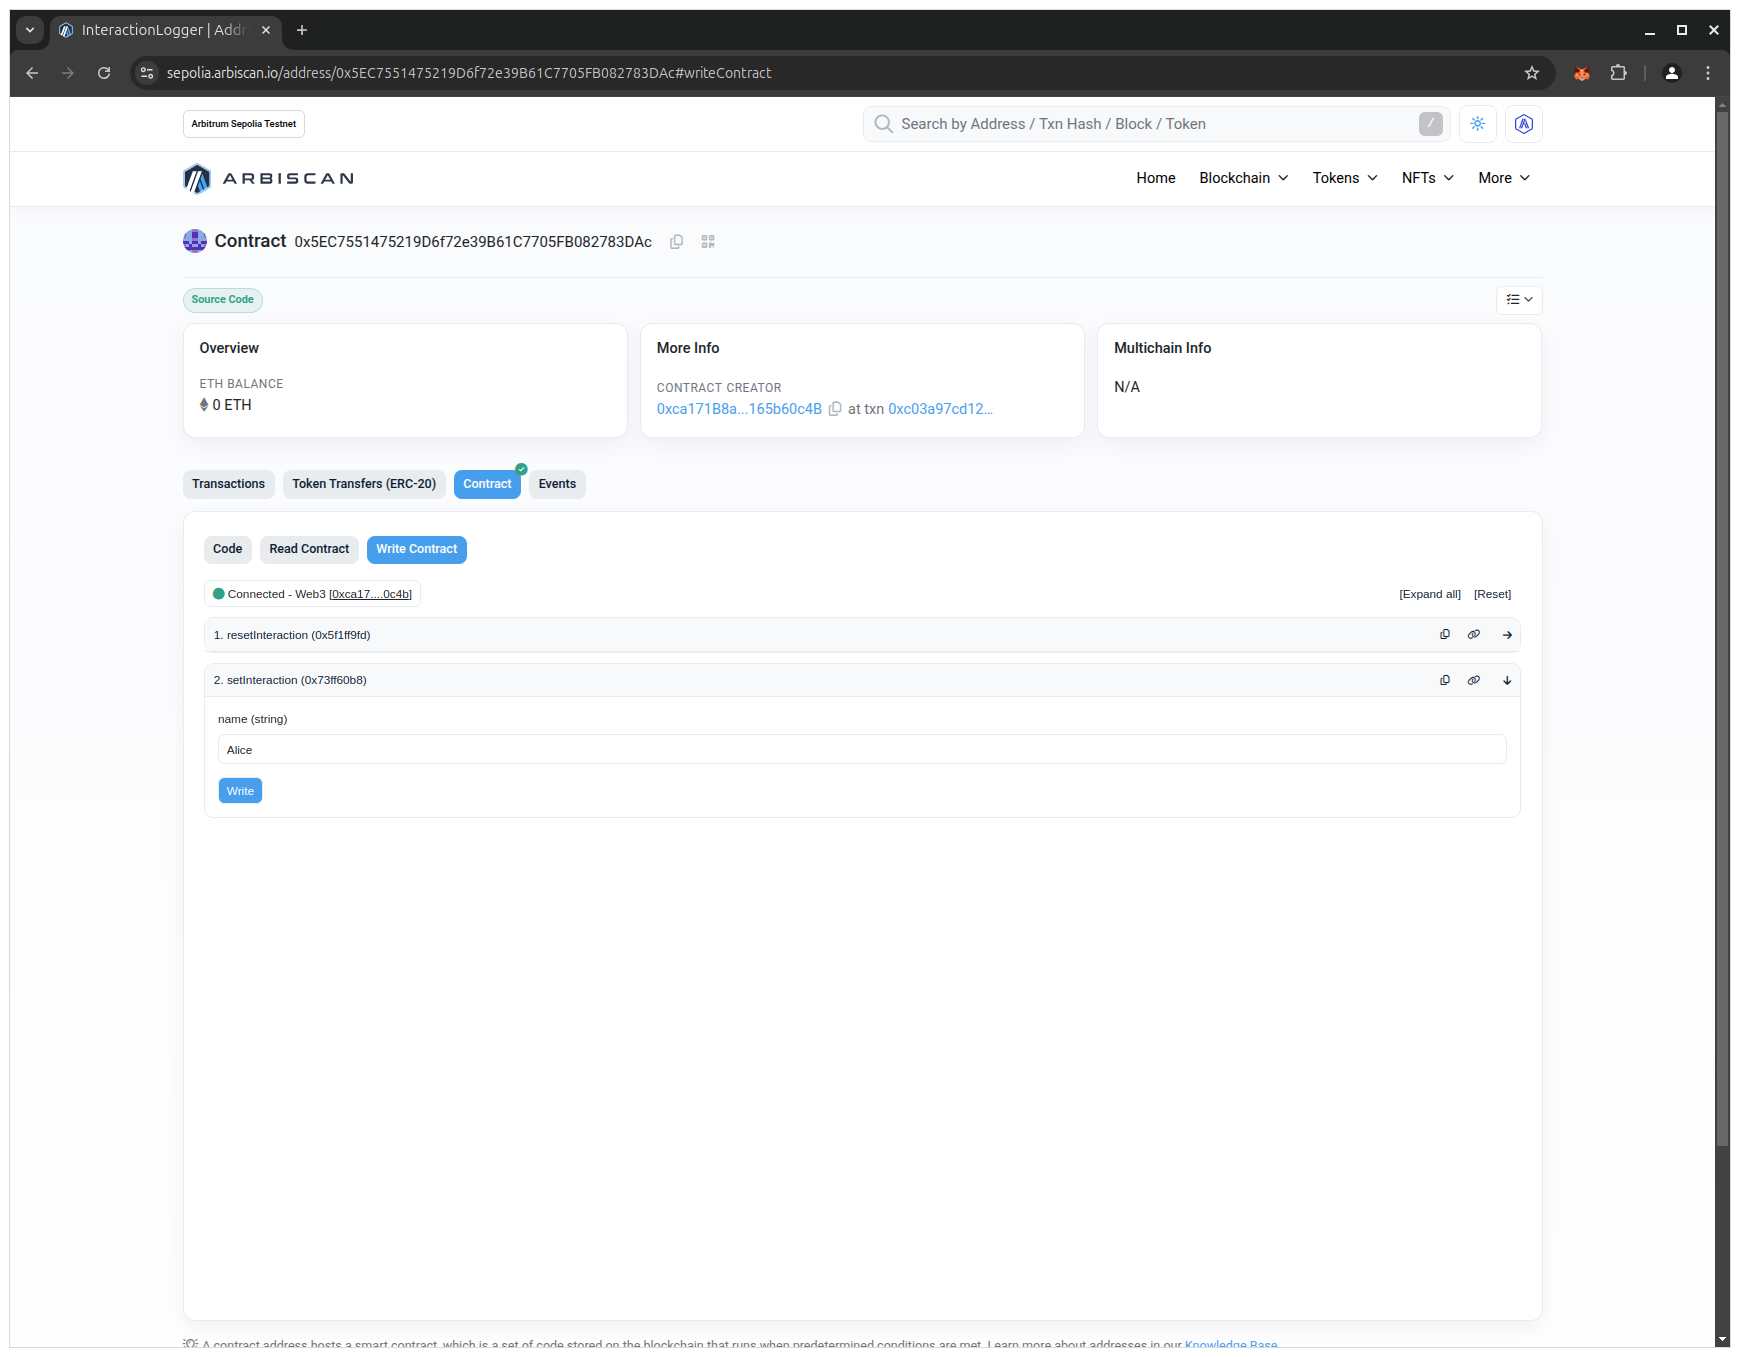
- Click on the setInteraction button, enter a name in the input field and click on the Write button:
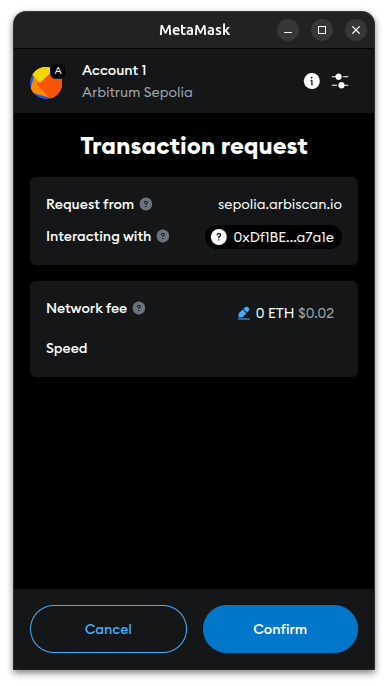
- Click on the Confirm button in the MetaMask wallet:
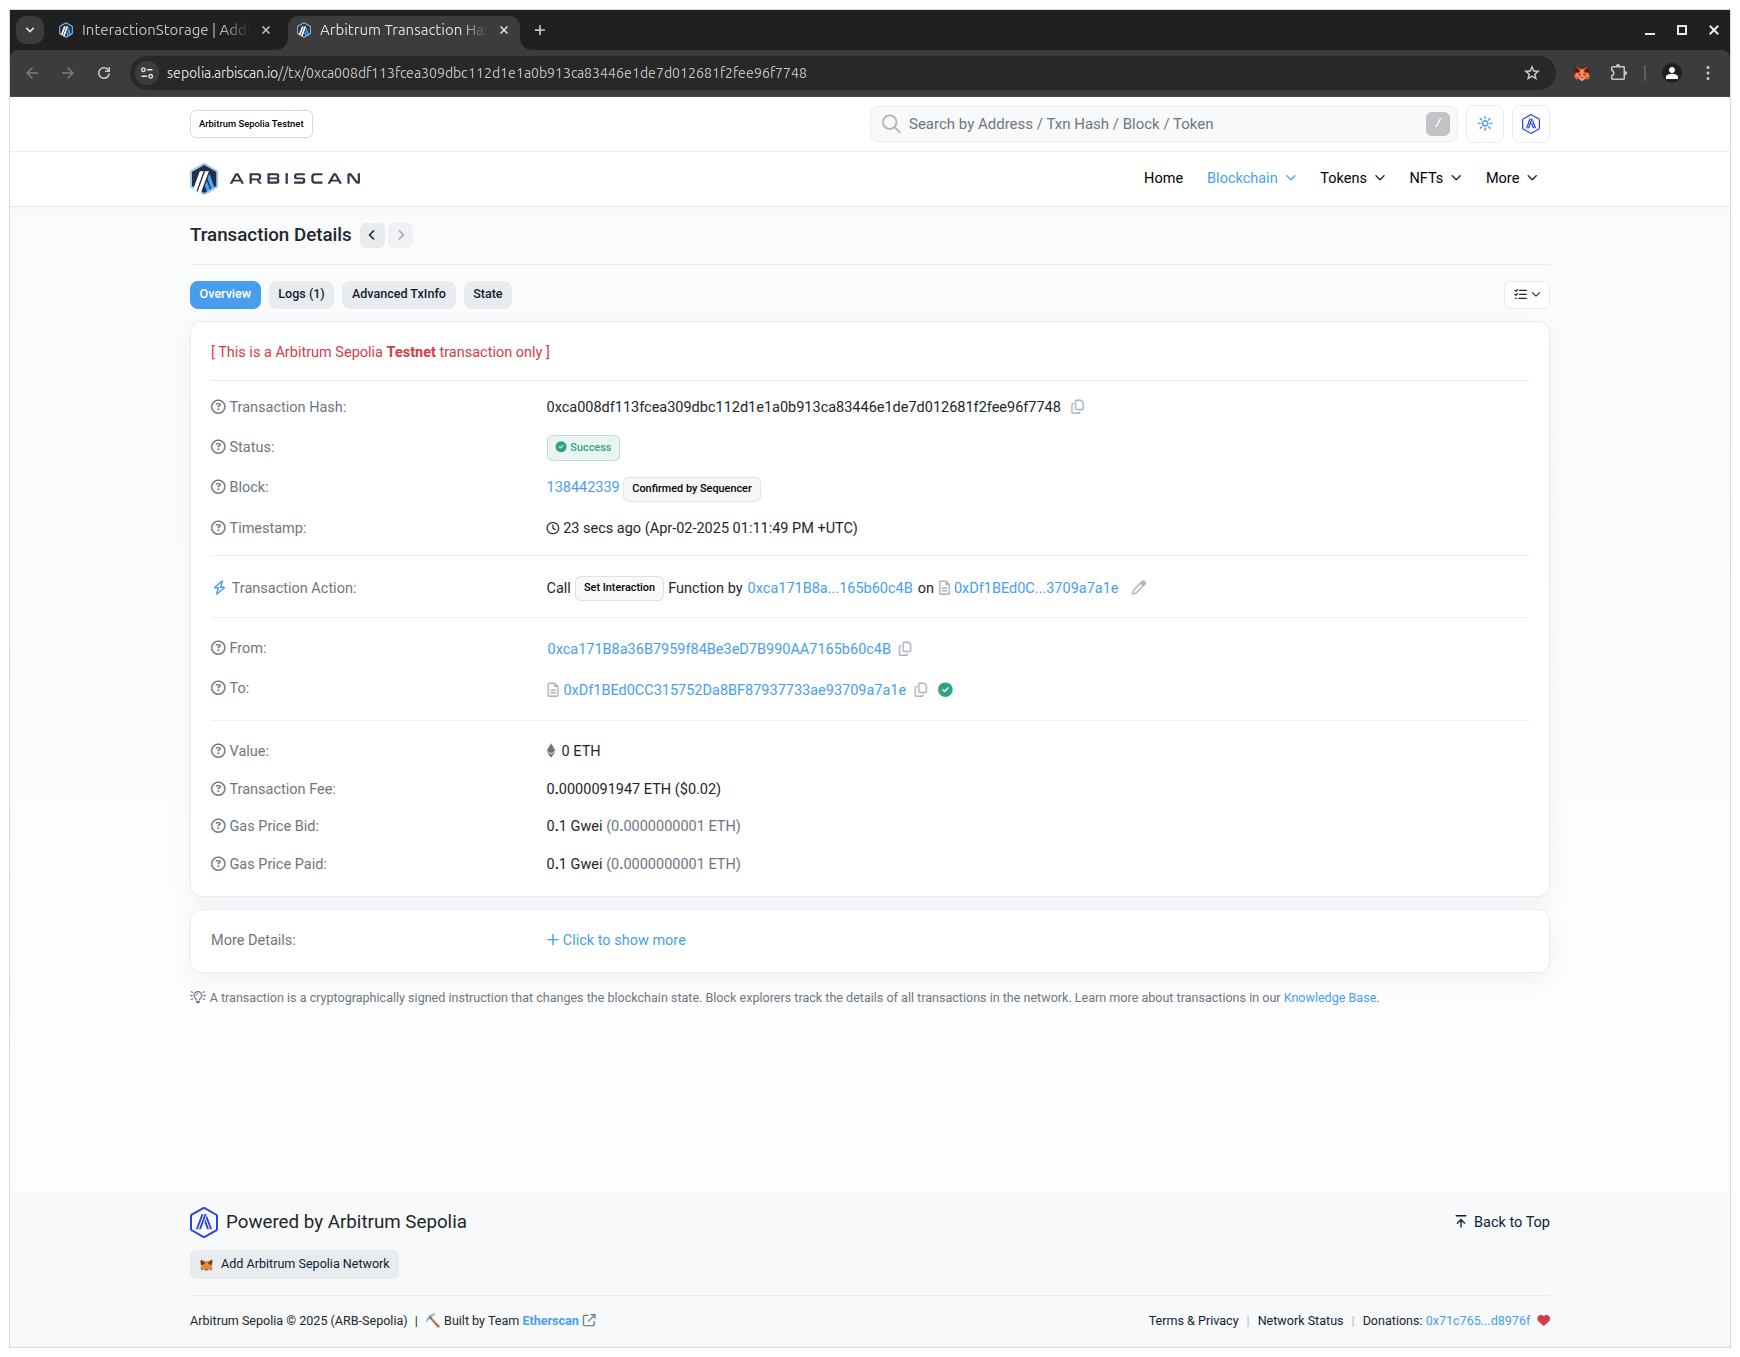
- Click on the View your transaction button. Usually, in less than a second, the transaction will be added to a block and you will see your confirmed transaction:
🔍 Breakdown
- Write actions create transactions and cost gas
- MetaMask signs the transaction and sends it to the network
- After confirmation, your contract state is updated
4.9 Read from the Contract via Arbiscan
🎯 Goal
Read the stored interaction via the explorer.
💻 Code
- Open the Read Contract tab:
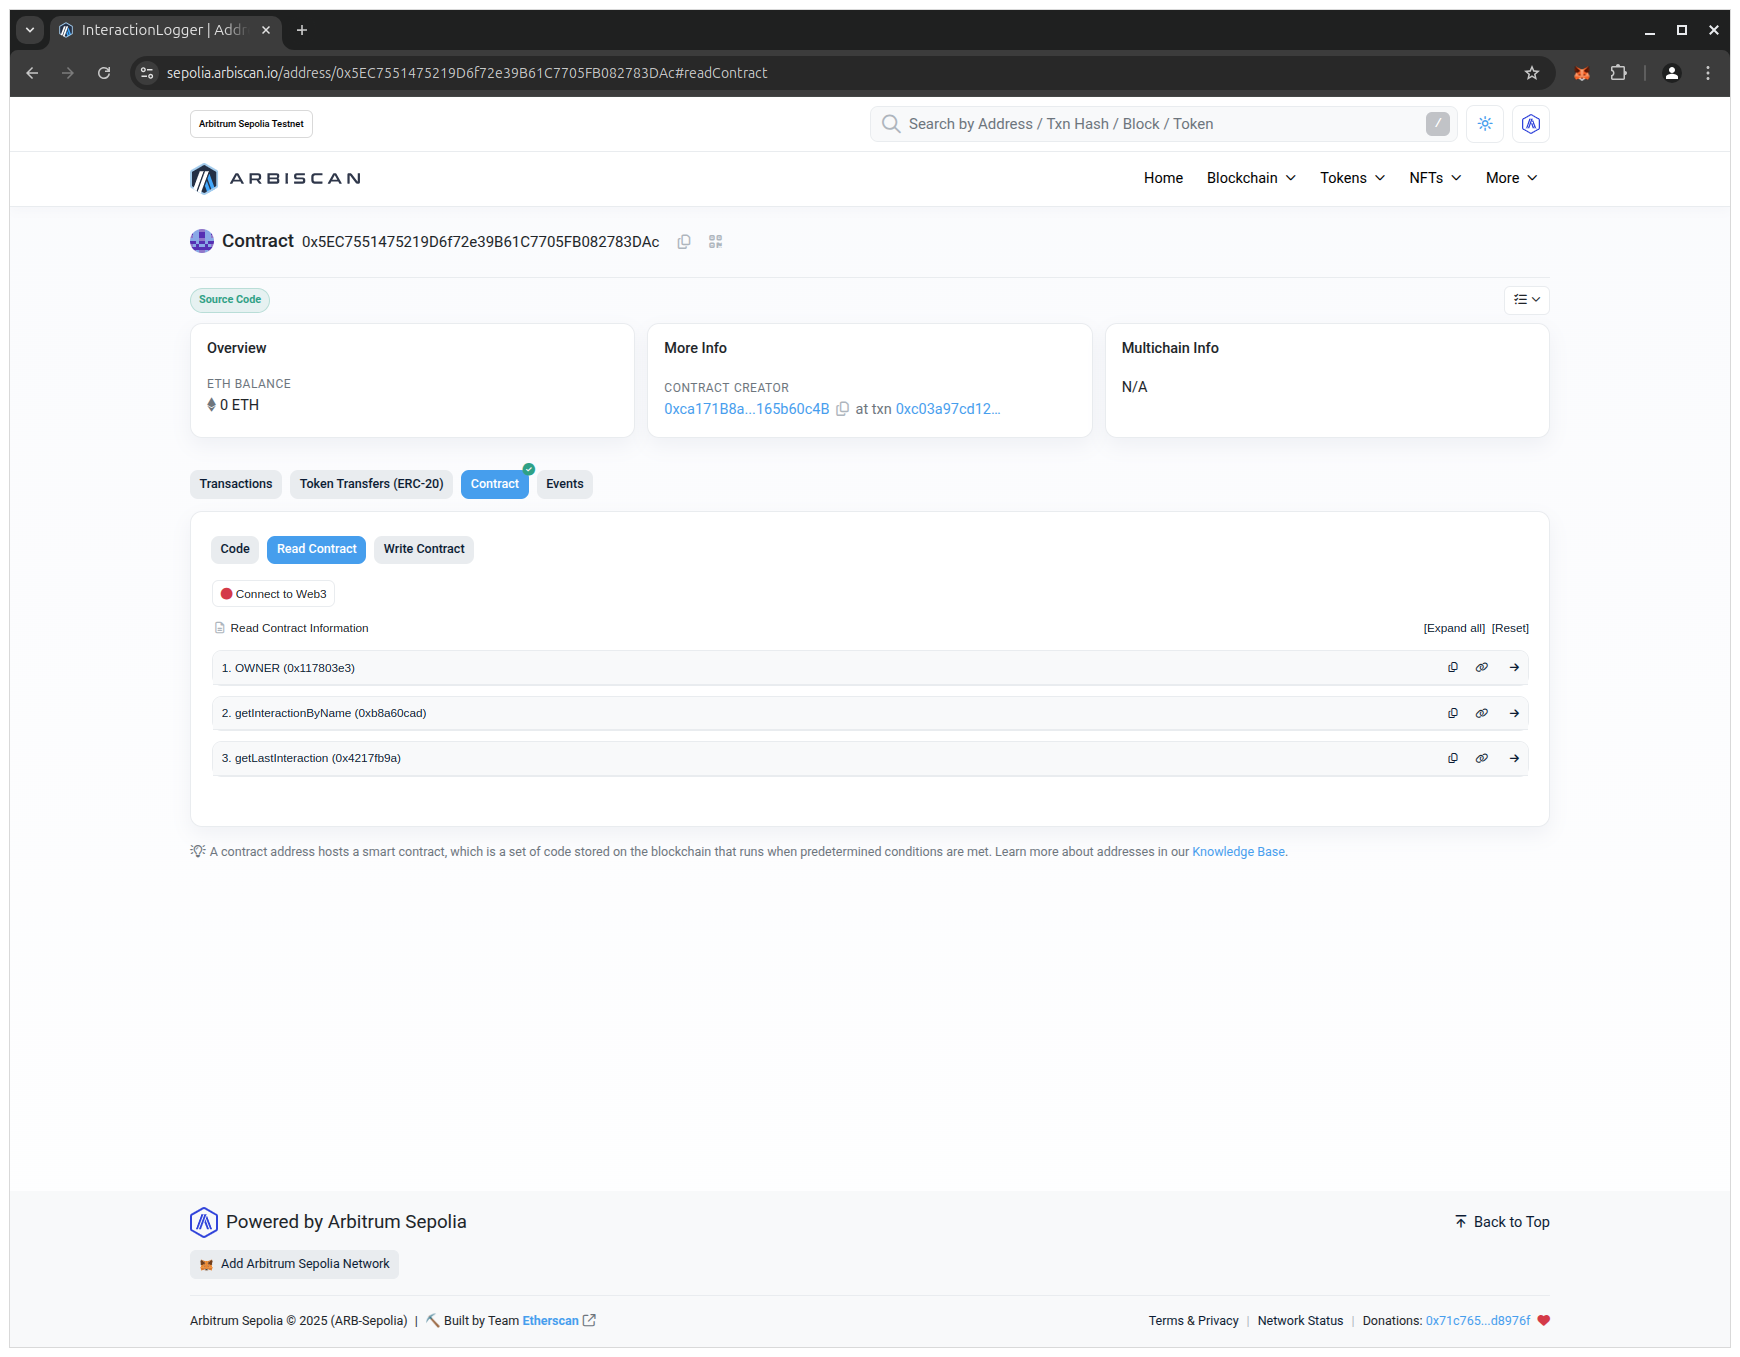
- Click on the getInteractionByName button, enter the previously set name in the input field and click on the Query button:
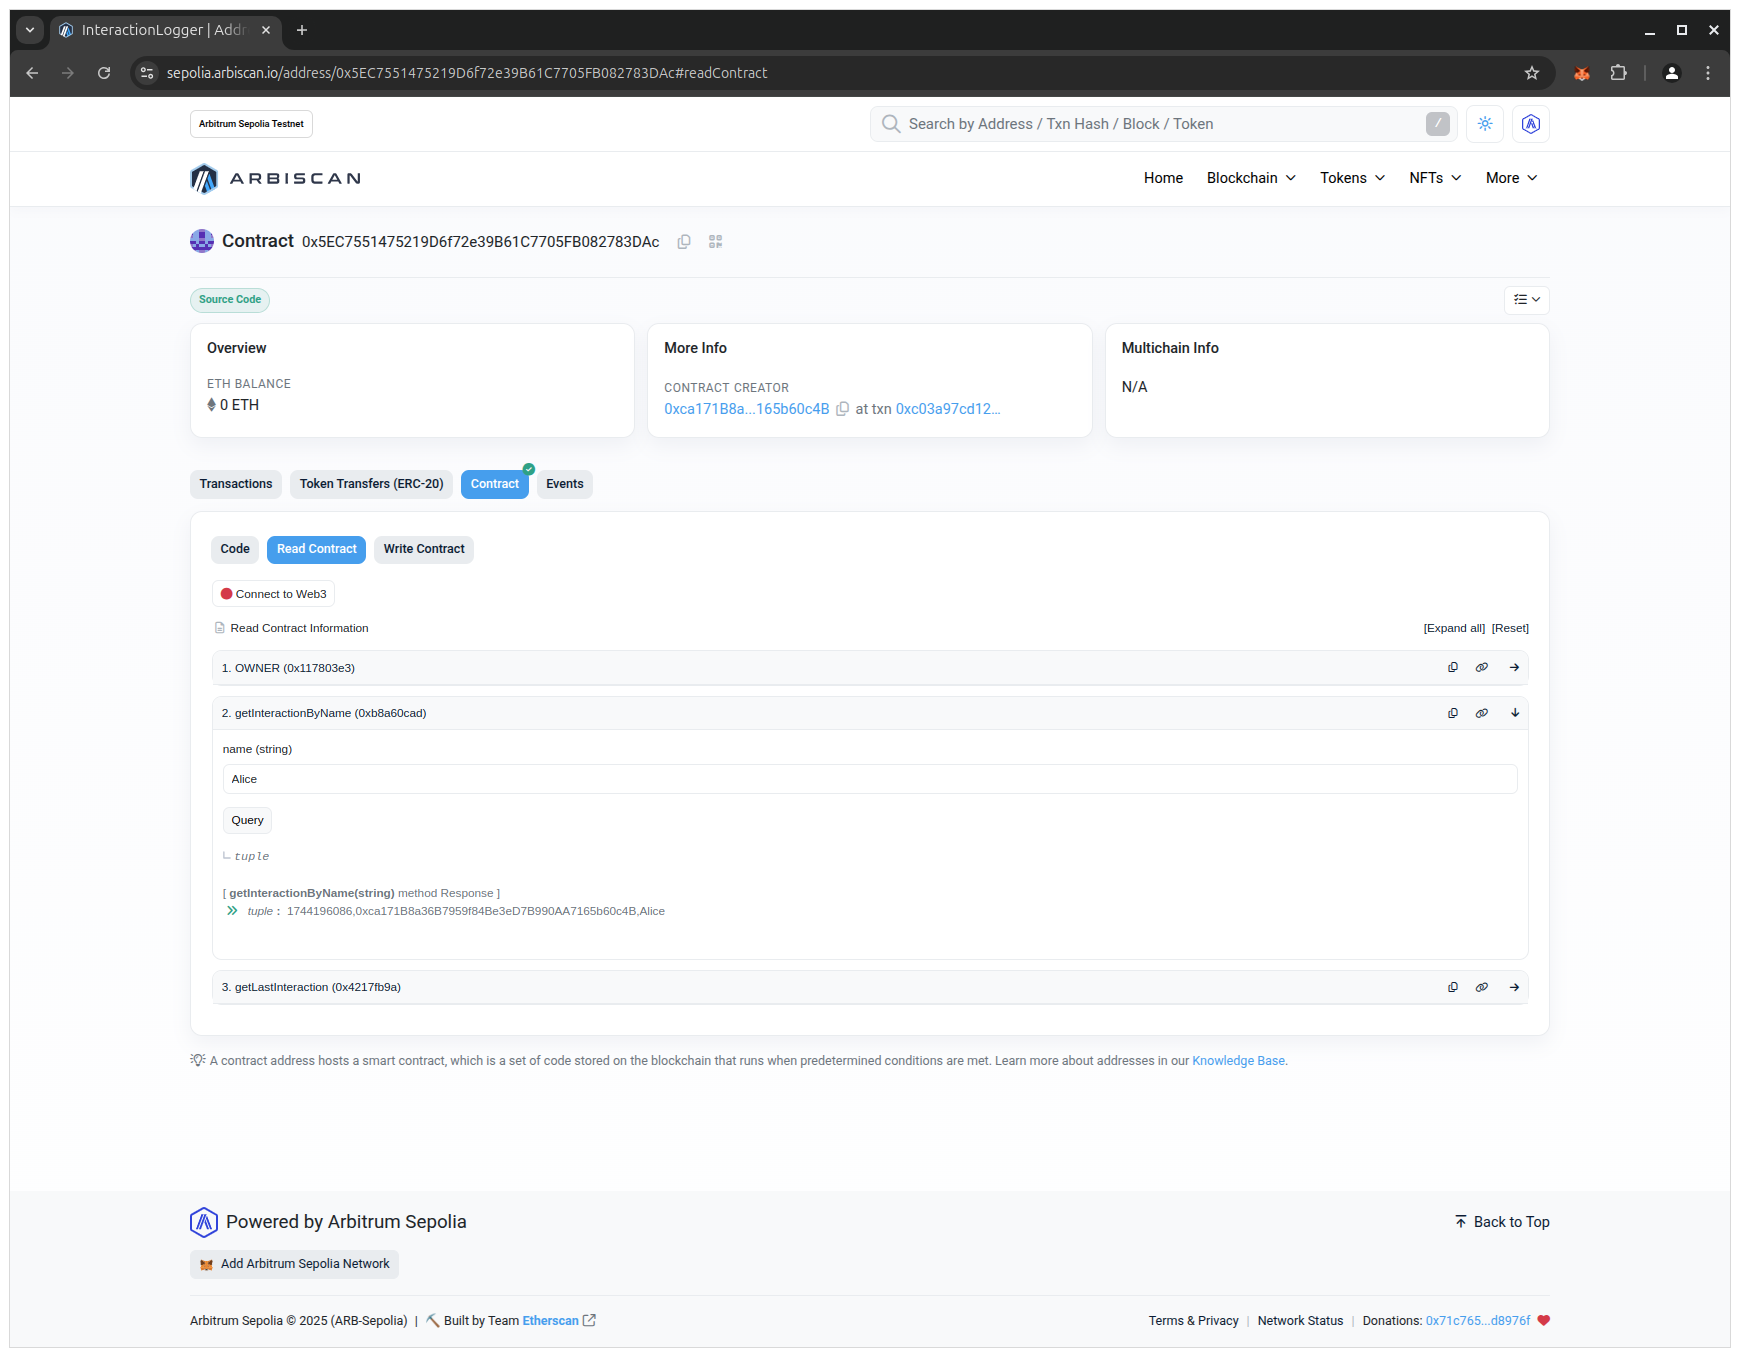
🔍 Breakdown
- Read calls do not change state
- They do not require gas and do not require transaction
5. What’s Next?
You now have a contract deployed locally (for fast iteration) and on a public testnet (for realistic conditions). That is the foundation for integrating a frontend or backend application.
In the next part, you will deploy a smart contract for managing fungible tokens.